|
Source:Tech-recipes.com/ Even if every other method fails, a bootable CD image will allow you to clean almost any infected system. As the viral world of computers and networking grows, so does the market of social engineering and virus development. Through the course of using the Internet and your computer, you will eventually come into contact with malware. A computer virus might corrupt or delete data on your computer, use your email program to spread itself to other computers, or even erase everything on your hard disk. The need for this guide became apparent when the latest version of the FBI MonePack Virus hit systems all over the world. The newest version has figured out how to disable all three safe modes in Windows, thus rendering virus removal through other methods virtually impossible. 1. The first step is to download and extract the downloaded zip file. You can do this by right-clicking the file after download and choosing Extract All. I use WinRAR in lieu of Window’s built-in WinZip feature, and I recommend you do the same. WinRAR is not technically freeware, but the trial never expires. Donate if you can!
2. There are two files from the extracted files that we will use. The “BurnCDCC.exe” file and the “Hiren’s.BootCD.15.2.iso” file. Double-click BurnCDCC.exe to run the application.
3. The CDCC program should run once you have double-clicked it. Click Browse in CDCC, and browse to and select the “Hiren’s.BootCD.15.2.iso” file that was extracted. Then click Open.
4. Since Hiren’s is only ~610MB, then you can either use a blank CD or a blank DVD. Insert the blank disk into your machine. In BurnCDCC under Device, your disk drive should be labeled. If you have multiple disk drives in your machine, then I am going to assume you know which drive you use for burning. Ensure the correct drive is selected. (If you only have one disk drive, then it should be selected by default.) I recommend checking the “Read Verify” box to ensure your write is successful, and leave the Speed bar at Optimal. (This is the bar dragged all the way to the right.) Once these checks have been made, click Start. If BurnCDCC ejects your disk and prompts to insert a blank one, simply push your disk back in the drive and select OK from the pop-up.
5. Now comes the fun (and potentially) confusing part. This step involves booting your computer from the disk you have just created instead of booting to the hard drive. This process can be fairly straight-forward, but for many it will not be. When you first boot your computer when it is completely shutdown (not in hibernate or sleep mode), you will most likely see a BIOS screen with a “Gigabyte” or “MSI” logo. (This could be many different screens, depending on your motherboard.) Either above or below this logo, you should see text similar to the following: “F12 for Setup,” “F10 for Boot Menu,” etc. What you are looking for is Boot Menu, Boot Order, Boot Screen, or the like. Common keys for this task are F2, F8, F10, F12 or Delete (Del). If your computer displays what key to use for Boot Menu, then begin tapping it repeatedly the instant you press the power button on your computer. Continue to tap it until you are presented with a Boot Menu which lists your Hard Drive, Disk Drive, and potentially your Flash Media or Floppy. If your computer does not say, then try the tapping process, using each of the common keys provided above. One of them should get you to the right place. If, by chance, you still cannot get into boot menu, then you will have to change your Boot Order or Boot Priority in your BIOS. BIOS will be one of the F-Keys listed above as well (normally a blue screen with white writing, though newer motherboards are moving to a 3D experience). Refer to your specific computer model’s manual on the manufacturers website if you have tried all of these but still cannot access the Boot Menu. You may even need to refer to the manual for your specific motherboard, which should be listed in the manufacturer’s manual. Once you have managed to get to your boot menu, select your Disk Drive, and press Enter. Your computer should now begin booting to Hiren’s BootCD. 6. Once Hiren’s BootCD loads, use the arrow keys on your keyboard to select the Mini XP option, and hit Enter. This will boot you into a weird distro of Windows XP. Once you have loaded Mini XP, you need to check to see what label your Local Disk has been given by the BootCD’s file hierarchy. Click Start, Programs, then Windows Explorer. When the Explorer window opens, it should default to My Computer. Here, it will list all the drives on your machine and a virtual drive created to run Mini XP. (My virtual drive was called the X:\ drive, and my Local Disk drive was called the D:\ drive.) Ensure you know which drive is your Local Disk (e.g., C:\, D:\, E:\, etc). You will need this for the virus removal stage.
8. You will be prompted with a CMD window telling you that it is better to run MBAM from your Operating System installed on your hard drive, but many viruses prevent that from happening. Disregard this error, and do as it says: Press Any Key on the keyboard. This will make the window go away, and Malwarebytes’ Anti-Malware (MBAM) will load.
9. Now, we need to update the virus definition database of MBAM. To do this, click the Update tab and then the Check for Updates button. When the updates have been downloaded, click OK on the window that pops up.
10. You are finally ready to begin the removal process! Click the Scanner tab at the top of MBAM. Ensure the Perform Full Scan radio is selected, and then click Scan. You will be prompted with a window that lets you select which drive to scan. This is where you select the drive you verified earlier by going to Windows Explorer and finding Local Disk. You can select other drives as well, but your Local Disk drive is the only one that really needs to be scanned. If you leave the virtual drive created for Mini XP (This is usually the X:\ drive.), then MBAM will find a few extra “infections” which are really utilities Mini XP uses. Removing them will not harm anything, since they cannot actually be removed from the CD.
11. Once MBAM has finished scanning your hard drive, you will be presented with a screen with a button labeled Show Results. Click it! This will bring you to a new window where the infectious files will be listed. Ensure ALL infections have a check mark beside them. Once you have checked everything, click the Remove Selected button.
12. I know this has been a long and drawn-out process. However, viruses have become very advanced, and when they completely prevent you from working directly on your hard drive and regular operating system, this method starts to look pretty good, in lieu of wiping and reloading the machine. From here, you can go to Start and then Shut Down, and boot your computer regularly into your hard drive. There should not be a need to go back to the boot menu. If you fell into the case where you had to modify your default boot priority by going into BIOS, repeat the steps you took to get into BIOS, and put your Hard Drive back as the first boot device. Removing Hiren’s BootCD from the drive should also alleviate the need to change the boot priority. Your computer should now be virus-free and back to working conditions. Do note, however, that many viruses can cause irreversible damage to your operating system. Luckily, most are simply spam and malware that are attempting to sell you something and do not cause internal damage. If you have removed the virus but still find your computer functioning improperly, you may have been one of the unlucky ones and acquired a malicious virus whose purpose is to cause problems within the system. If this is the case, then backing up your data and reloading your operating system may be the final solution.
|
Category: Computers


How to Add Shortcuts to “My Computer” in Windows
|
Source: howtogeek.com/
Have you ever wondered how those third party tweaking programs allow you to add custom shortcuts to the Computer dialog? It’s actually really easy. Note: this should work in at least Windows 7 and Windows 8, but it might work in Vista. Maybe. How to Add Shortcuts to the Computer Dialog in WindowsPress the Win + R keyboard combination to bring up and run box, then type the following.
Then hit enter.
That should have opened the location where Microsoft looks for any additional shortcuts to display in the Computer dialog. So all we need to do is create a new shortcut to whatever we want to be displayed, this can be a file, folder or even a program.
When the Create Shortcut wizard opens, simply type in the location of the item you wish to create a shortcut to and click next.
Then give your shortcut a suitable name and click finish.
Voila, that is really all there is to it.
|


Biến máy tính thành thiết bị phát sóng Wifi
|
Source: Internet Bài viết dưới đây sẽ mang tính năng Wifi Hotspot lên Windows, giúp biến chiếc máy tính đang có kết nối Internet của bạn thành một thiết bị phát sóng Wifi để các thiết bị khác có hỗ trợ kết nối Wifi có thể bắt sóng và truy cập Internet dễ dàng.Bạn có những thiết bị di động có khả năng kết nối Wifi, như điện thoại di động, smartphone hay máy tính bảng… nhưng hiện tại không có mạng Wifi để kết nối?
Hiện tại phần lớn các smartphone hay máy tính bảng ngày nay đều trang bị tính năng Wifi Hotspot, cho phép phát sóng Wifi từ mạng 3G mà thiết bị đó đang sử dụng để các thiết bị khác có thể kết nối và truy cập Internet.
Wi-Host là phần mềm miễn phí dành cho Windows sẽ thực hiện chức năng tương tự. Theo đó, Wi-Host sẽ biến chiếc máy tính có kết nối Internet (thông qua dây cáp) thành một thiết bị phát Wifi, để chia sẻ kết nối Internet với các thiết bị khác có hỗ trợ Wifi.
Wi-Host là công cụ hữu dụng trong trường hợp bạn đang sở hữu các thiết bị có kết nối Wifi, nhưng chưa có điều kiện để lắp đặt Wifi tại nhà hay tại nơi làm việc.
Download phần mềm miễn phí tại đây.
Sau khi download, giải nén để sử dụng. Bên trong có chứ 2 thư mục, tương ứng với phần mềm dành cho Windows Vista/7 và phiên bản dành cho Windows 8. Bạn chọn phiên bản phù hợp với hệ điều hành mình đang sử dụng.
Wi-Host là phần mềm dạng portable (bỏ túi) nên có thể sử dụng ngay mà không cần cài đặt.
Để sử dụng phần mềm, bạn phải chạy chương trình bằng quyền quản lý (administrator) của Windows. Do vậy, bạn kích chuột phải vào file Wi-Host.exe, sau đó chọn “Run as administrator” từ menu hiện ra.
 Sau khi kích hoạt phần mềm, việc đầu tiên bạn nên thực hiện là kiểm tra xem laptop đang sử dụng có hỗ trợ tính năng phát Wifi hay không. Để thực hiện điều này, bạn kích vào nút “Hosted Netword Supported?” trên giao diện chính của phần mềm.
 Nếu hiện ra hộp thoại với thông báo “Your Wifi Adapter supports Hosted Network” nghĩa là bạn có thể biến chiếc máy tính đang sử dụng thành một thiết bị phát Wifi.
 Tiếp theo là thực hiện các bước thiết lập để tạo mạng Wifi được chia sẻ từ máy tính chạy Windows. Bây giờ, bạn nhấn vào nút “Setup Hosted Network” (hoặc chọn tab “Setup Hosted Network”) từ giao diện chính của phần mềm.
Tại đây, bạn đặt tên của mạng Wifi muốn được chia sẻ từ máy tính vào mục “New Network Name (SSID)” và mật khẩu (bất kỳ) tại mục “Hosted Network Key” để bảo mật cho mạng Wifi này.
Lưu ý: mật khẩu phải có tối thiểu 8 ký tự.
 Cuối cùng, nhấn nút “Setup Network” sau khi đã hoàn tất các bước thiết lập.
Một hộp thoại hiện ra thông báo cho bạn biết bước thiết lập đã hoàn tất. Nhấn OK trên hộp thoại này. Một hộp thoại thứ 2 hiện ra hỏi bạn có muốn bắt đầu phát Wifi từ máy tính hay không, nhấn Yes tại hộp thoại này để đồng ý.
Sau khi nhấn Yes, một hộp thoại thứ 3 hiện ra để yêu cầu người dùng hoàn tất bước cuối cùng trước khi có thể biến máy tính thành một điểm phát Wifi.
Theo mặc định, Windows không cho phép máy tính chia sẻ mạng Internet vì lý do bảo mật, do vậy người dùng cần phải tự tay kích hoạt tính năng chia sẻ Internet trên máy tính để từ đó cho phép các thiết bị có thể kết nối vào Internet từ mạng Wifi do máy tính tạo ra.
Để làm điều này, bạn nhấn vào nút “Open Network Connections” từ hộp thoại cuối cùng hiện ra (như đã nói ở trên), hoặc truy cập vào mục “Network and Sharing Center” thông qua Control Panel trên Windows.
 Từ cửa sổ “Network Connections” hiện ra, bạn kích chuột phải vào biểu tượng mạng Wifi do phần mềm Wi-Host tạo ra, chọn “Properties”.
 Tại hộp thoại hiện ra sau đó, nhấn vào tab “Sharing”, sau đó đánh dấu vào tùy chọn “Allow other network users to connect through this computer’s Internet connection”. Nhấn OK để lưu lại thiết lập.
Lưu ý: đây là các bước thiết lập chỉ cần thực hiện một lần. Do vậy ở những lần sử dụng sau, bạn không cần phải tiến hành lại các bước thiết lập này.
 Bây giờ, bạn có thể sử dụng các thiết bị di động có hỗ trợ kết nối Wifi để kết nối vào mạng Wifi vừa được tạo ra để có thể truy cập vào Internet.
 Mạng Wifi có tên “Test” được tạo ra bởi phần mềm Wi-Host có thể được phát hiện và kết nối từ thiết bị di động
Phạm Thế Quang Huy
|
Why is My Nexus 7 So Slow? 8 Ways to Speed it Up Again
| Source: howtogeek.com
Everyone seems to be complaining about their Nexus 7 tablets slowing down over time. Sure, this is anecdotal — but there are a lot of anecdotes. We’ll cover a variety of ways to speed it up. Many people report that the update to Android 4.2 slowed down the Nexus 7. However, it seems that many issues can cause Nexus 7 slowness. We’ve looked all over the web to see the tricks people recommend. Free Up Some SpaceMany people report that the Nexus 7 slows down as it fills up. When the 16GB Nexus 7 gets to about 3GB of storage space left, it begins to slow down. Filling up your Nexus 7′s storage space causes its write speed to slow down, slowing down the system. This will be even more of an issue if you have one of the original 8GB Nexus 7′s, which doesn’t give you much wiggle room for storage space. If it’s slowing down, try removing apps and files to free up space.
Run TRIM (LagFix or ForeverGone)Due to a bug with the driver for the Nexus 7′s internal Samsung NAND storage, Android on the Nexus 7 was not properly issuing TRIM commands to clear unused sectors. This caused write speeds to slow down dramatically. This was fixed in Android 4.1.2, and Android should now properly be issuing TRIM commands to the internal storage. However, this update does nothing to fix existing sectors that should have been TRIMMed in the past, but were not. To do this yourself, you can try the LagFix app from Google Play (it requires root). This app is a frontend to the fstrim utility, and it will TRIM your empty storage, fixing this problem.
If your tablet isn’t rooted, you’ll need to use Forever Gone, which will fill your storage up with empty files and then delete them, causing Android to issue the TRIM command on the storage. If you want to test whether this is actually doing anything, you can run the Androbench storage benchmark app before and after to test your NAND storage write speeds and see if they improve. Disable Currents Background Sync & Other Background AppsAs we noted in our Nexus 7 troubleshooting guide, Google Currents syncing is a notorious cause of lag on the Nexus 7. If your Nexus 7 is too slow or isn’t responding to touch events properly, open the Currents app, go into its Settings screen, and disable the Syncing option. This will prevent Google Currents from constantly downloading and writing data in the background.
You may also want to disable background-syncing in other apps, or set them to sync infrequently — similar problems could be caused by other apps downloading and writing data in the background. Some users on Reddit have reported that lag with Android 4.2 can be fixed by disabling location access on your tablet. This will prevent apps like Google Now and Google Maps from determining your current location, but it’s worth a try if your tablet is behaving so slowly. You’ll find this setting under Settings -> Location Access.
Use the AOSP Browser, Not ChromeOkay, let’s be honest — Chrome is very slow on Android. Chrome is speedy enough on Google’s Nexus 4, but that’s because the Nexus 4 has much more powerful hardware than the Nexus 7. Chrome on the Nexus 7 is rather slow — scrolling in particular can be very jerky. Chrome has improved since the Nexus 7 was introduced, but its performance is still nowhere near good enough. Android’s included browser — known as the AOSP (Android Open Source Project) Browser — is faster than Google Chrome. In particular, scrolling is much smoother. However, the AOSP browser doesn’t have Google Chrome’s excellent syncing features. Google doesn’t include Android’s default browser with the Nexus 7, but you can install it anyway if your Nexus 7 is rooted. Just install the AOSP Browser Installer app and use it to install the AOSP “Browser” app on your tablet.
Delete Multiple User AccountsIf you have multiple user accounts set up on your Nexus 7, you may want to disable them. When you have multiple user accounts set up, apps on other user accounts are syncing data in the background — so if you have three user accounts, three different Gmail accounts will be syncing in the background at once. It’s no surprise that this can slow things down on the Nexus 7′s older hardware. If you can get by without multiple user accounts, delete any other user accounts and just use a single one. You can do this from the Settings -> Users screen.
Wipe Your CacheTo speed things up, you may want to try wiping your cache partition from Android’s recovery menu. First, shut your Nexus 7 off. Press and hold the Volume Up + Volume Down + Power buttons to power the device on — it will boot into the below screen.
Use the Volume Up and Volume Down keys to select the Recovery mode option, and then press the Power button to activate recovery mode.
Select the wipe cache partition option with the volume keys and tap Power. This will clear all your cached app data, which may help speed things up.
Troubleshoot With Safe Mode and Factory ResetIf your Nexus 7 is slow, you can try booting it into safe mode, which will boot a clean default system without loading any third-party apps. This will let you know if third-party apps — perhaps widgets, live wallpapers, or other apps doing work in the background — are slowing your system down.
You can also perform a factory reset and starting over from scratch. Much of your data is synced with your Google account, including a list of apps you had installed, so you’ll be able to restore much of your data after the reset.
Downgrade or Install Custom ROMIf you think Google messed up the Nexus 7 with Android 4.2, there’s good news — you can downgrade your Nexus 7 back to Android 4.1.2. You’ll just need to download the appropriate factory image from Google and flash it with the included .bat file. We can’t guarantee this will fix your speed problem, but it’s worth a try if you remember your tablet being much faster with Android 4.1 and it still seems slower. As on any Android device, you may also want to install third-party ROMs like Cyanogenmod.
The reality is that the Nexus 7 didn’t have amazing hardware when it was introduced, over a year ago. It’s no surprise that the Nexus 7 is slower than the iPad Mini and other tablets, as the Nexus 7 just has a slower chipset inside. NVIDIA’s older Tegra 3 chipset just isn’t competitive with the latest hardware. For this reason, Google is widely expected to launch a new Nexus 7 with updated internals in the next few months.
|


Supersize your free cloud storage to 100GB or more
|
Source: PCWorld
If you have the space, that is. Truly wondrous setups require robust cloud storage capabilities, but that doesn’t mean you have to drop dollars for extra gigs. Most services offer free accounts with modest quantities of complimentary cloud storage. In isolation, these pittances don’t amount to much, but merged into Voltron-like unity, the free storage from several services can achieve mammoth totals. With some patience, you can build your own supercloud with more than 100GB of free storage. With a lot of patience (and pestering of your pals), you can nab more than 225GB. And all that online storage is free-as-in-free-beer free. Here’s how to do it, along with some tips on how to manage your storage hoard to take advantage of each service’s unique properties. Getting startedSetting up a personal supercloud can be tedious, depending on how many such services you already use. Your first step should be to grab all of the services that install dedicated areas in the Favorites column of Windows Explorer.
Amazon Cloud Drive: 5GB Box: 5GB (but read “Beyond referrals” below before installing Box, as you may want to postpone installing this one) Dropbox: 2GB Google Drive: 5GB MiMedia (m)Drive: 7GB SkyDrive: 7GB (longtime SkyDrive users may be eligible for 25GB free) SpiderOak: 2GB Storage subtotal to this point: 33GB
Now install SugarSync, which assigns itself a virtual drive letter—à la the C: or D: drive—instead of a customized folder. SugarSync offers 5GB free to start. Next, install the two cloud services that use a desktop app to sync and store files instead of creating a folder in Windows. MediaFire: 10GB Ubuntu One: 5GB Storage subtotal to this point: 53GB Finally, open an account at the notorious Mega.co.nz to grab a whopping 50GB of free online cloud storage. Mega doesn’t offer multiple device syncing. Instead, it functions more as an in-browser, Box-like storage locker. The service expects to add mobile apps and accompanying device syncing at some future date, but those options aren’t available today. Tip: Both SpiderOak and Mega currently use encryption schemes that make recovering your password impossible. If you forget your password for either service, you’ll lose access to your files permanently. We strongly recommend that if you have a hard time remembering passwords, you give the LastPass password manager a whirl. Just like that, your supercloud has mushroomed to an impressive 103GB. Now let’s look at some ways to get even more storage. Refer your friends to get more storageSeveral cloud services offer extra storage in 500MB increments for every friend that you refer to it, but the maximum amount of free storage they permit under these bounty programs varies. Dropbox lets you add up to 16GB via referrals, while Ubuntu One tops out at 20GB of extra space, and SugarSync allows up to 32GB of additional storage in half-gig chunks. Note that Dropbox requires each referred user to join Dropbox, install the service’s desktop app, and sign in to the desktop app after installation.
MiMedia offers you an additional 1GB of storage for every five friends you sign up, with a ceiling of 5GB of extra space from such referrals. SpiderOak and MediaFire are a bit more generous, offering 1GB of additional free storage for each referral, to a maximum of 10GB and 32GB, respectively. Beyond referralsAn easier way to increase the amount of free Dropbox storage available to you is to install the Dropbox app for Android or iOS, and then authorize automatic photo uploads from your device. Once authorized, the Dropbox mobile app will automatically begin uploading all photos snapped on your device to Dropbox. Dropbox doles out an extra, permanent 500MB to your account, as you need it, until you reach 3GB worth of free picture-driven storage. Dropbox also presents you with 250MB of free space for completing its Getting Started tutorial. SugarSync gives users a few ways to acquire extra free storage in 125MB chunks: You can install the mobile app for Android, BlackBerry, or iOS; or share a file or folder with a public link, or a folder with a private link; or upload a file to your account via email.
MediaFire rewards you with 2GB for installing the MediaFire desktop, and 2GB more for installing mobile apps. Connecting your Facebook and Twitter accounts to MediaFire fetches you another 1GB each. And if you spam your social networks about MediaFire, you receive another 1GB of storage. Box doesn’t have a referral program, but the company often offers 50GB of free storage to new users. Following the company on Facebook is a good way to find out quickly when the next 50GB giveaway is about to happen.
Both Google Drive and Microsoft offer free storage as an add-on when you make certain purchases. If you buy selected Chrome OS devices, Google will dole out either 1TB or 100GB of extra free Google Drive storage space for a limited time. Google maintains a list of Chromebook storage deals here. Microsoft offers an additional 20GB of SkyDrive storage to Office 365 Home Premium subscribers. Annual subscriptions to the Office suite cost $100 per year. Not including the offers from Box, Google, and Microsoft, the referral and social media credits listed here could help industrious and methodical gleaners snag another 126GB of free cloud storage. But once you’ve accumulated all that space, how do you use it effectively? The key to maximizing your use of a vast mound of fractured cloud storage is to match what you commonly do with cloud storage to each service’s strengths and weaknesses. General sharing and syncOnce you’ve beefed up its storage total, Dropbox should be your service of choice for file syncing, thanks to its unparalleled platform support and widespread use. Box, SpiderOak, SkyDrive, and MediaFire are solid options, too. SugarSync lets you choose specific folders to sync, rather than forcing you to dump all of your files into a central location, and that feature may appeal to some people. For sensitive documents, you’ll want to use SpiderOak, which advertises fully encrypted, zero-knowledge online data backup (and sync). It’s rock-solid. For less sensitive material that nonetheless requires encryption, you could use Mega. Security researchers recently called Mega’s encryption scheme into question, and Mega founder Kim Dotcom is not beloved in law enforcement circles, but even so it offers more protection than typical cloud services do. Just make sure that you have backups handy in case Mega goes the way of Megaupload. Online collaborationGoogle Drive is your best bet if you need to edit a document online with one or more people. Google Drive features robust editing features, thanks to its integration with Google Docs, including multiuser, simultaneous editing. Since millions of people rely on Google services, most of the people you need to work with probably use Google Docs. You can edit documents with Google’s mobile apps for Drive on Android and iOS.
A second choice would be Microsoft’s SkyDrive. Microsoft offers free Web-based versions of its well-known Office suite, including apps for Word, Excel, OneNote, and PowerPoint. Office Web apps often experience technical hiccups, however, and the Word Web app doesn’t have an autosave feature—so you risk losing work if you forget to save. The collaboration features aren’t as seamless as Google’s, either. For example, both writers must save to see the other person’s changes when collaborating on a Word doc. Box offers online document editing as well as Web-based integration with Google Docs. MediaThe natural choice for streaming music is Amazon’s Cloud Drive, but the company recently separated its cloud storage and cloud music services. Dropbox offers music streaming through its mobile apps, but it will play only one song at a time. In December, Dropbox acquired Audiogalaxy, a music streaming service, prompting many observers to speculate that a Dropbox-powered music feature is on the way. MiMedia offers media streaming, but I can’t recommend it for that purpose. In my tests, MiMedia choked when uploading videos as small as 18MB. Also, using MiMedia’s Dropbox-style folder on Windows 8 caused Windows Explorer to hang repeatedly, a problem I didn’t encounter with any of the other cloud services. If you want to stream music online, a good choice is SugarSync, which offers music streaming as part of its service. You could also just stick with Google Music (not previously mentioned, as it doesn’t offer traditional storage), which lets you upload 20,000 tracks from your personal music library and stream them from any online location you can reach. For online video streaming, you can use Jolidrive (see below). Backups and cold storageSpiderOak and Ubuntu One let users backup specific folders to the cloud. MiMedia’s desktop application also works well for folder-specific backups, which don’t rely on manual uploads or file manipulation.
Box and Mega are ideal for storing files that you rarely access but want to keep in the cloud, especially if you can snag one of Box’s 50GB free introductory deals. You can also use Mega’s 50GB of free storage to store ample wares—but again, don’t rely exclusively on Mega for file storage. It might go away. Bringing it all togetherManaging multiple cloud services can be a pain, even with widespread Windows Explorer integration. Fortunately, you don’t have to handle the job on your own: Jolidrive from Jolicloud creates a cloud services dashboard that displays your Box, Dropbox, Google Drive, SkyDrive, SugarSync, and Ubuntu One files in one location. Jolidrive is especially helpful when you’re on a public PC and you need access to your cloud files.
The service adds a few handy features of its own, such as music and video streaming, Google Drive document editing, and integration with Pocket and Instapaper. You can also connect various social networks—including Facebook, Google+, and Tumblr—to Jolicloud to view your social feeds in a Pinterest-style layout. Jolicloud doesn’t offer a way to transfer files between cloud services. A similar service called Otixo does provide that functionality, but Otixo no longer offers a free version of its service, alas. And that’s that. Welcome to your fully functional and uber-flexible hard drive in the cloud! Now, how to fill all that free space…
|
 Amazon
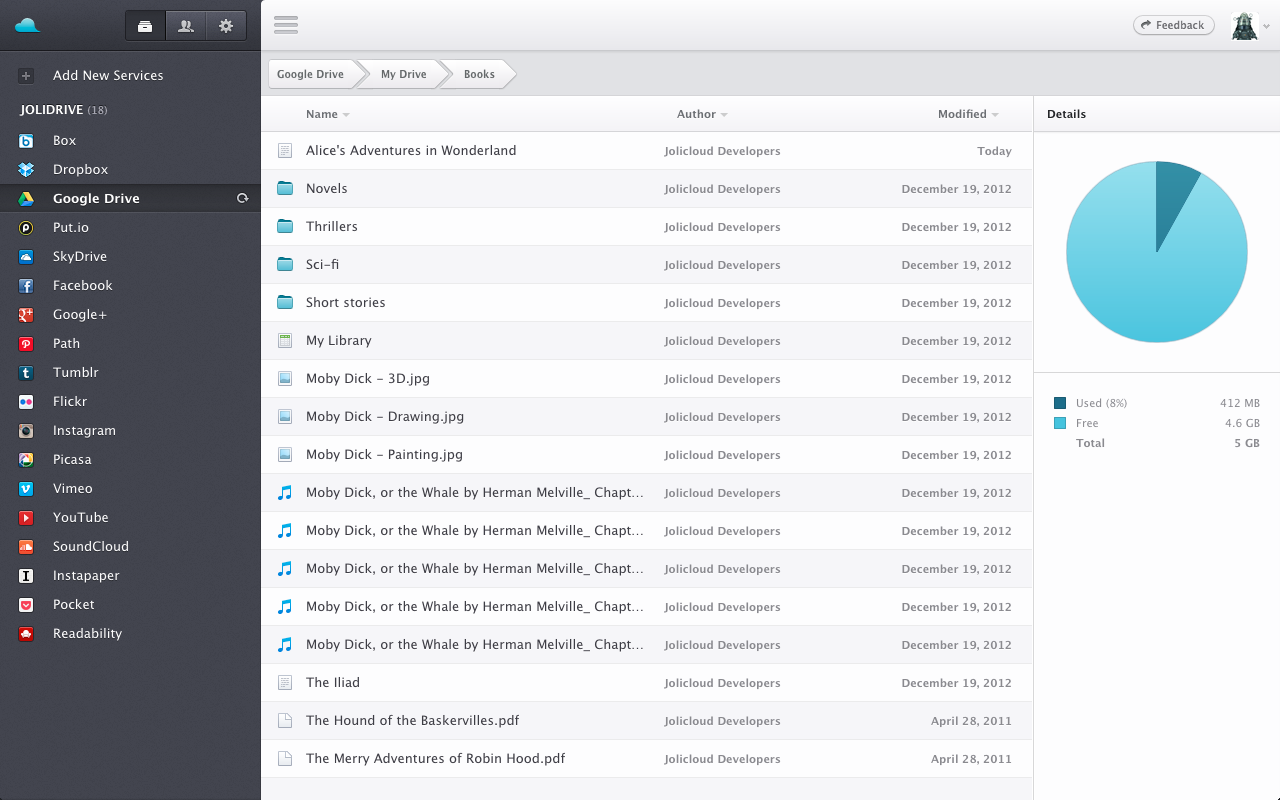
What Is A Blog And Blogging?
Nowadays, most of you would have heard a lot about BLOG or BLOGGING and considered it just another type of a website. Actually, the word BLOG is an abbreviation of “WEBLOG” and to make it easy for you to understand, it’s more like a Personal Diary Writing. You know there are few people who always write a note at the end of the day in a personal diary, about what they did whole day and how it went. Blogging is almost the same thing in which you can write the updates about yourself, technology news, general stuff on a daily basis and the article are arranged on the Internet in a reverse chronological order (means from the latest date to old)It’s not a new thing or concept, Blogs are here for more than 10 years now. It’s a way to communicate with people, tell them what you know about or want to share with them. While browsing the Internet, you often do not know if you are looking at a blog or at a traditional Website. But it doesn’t matter what it is, they are both designed to do the same thing, which is to share the information with the public / audience.
In the beginning, blogs were used as a personal diary or a journal and people were sharing their daily routines and works with their friends and community on the Internet. Still many of my friends do that, they simply write their whole day routine on the Internet, some of them writes about politics in general and than many people leave their comments / remarks on their articles. It’s like sharing of thoughts with the rest of the world / community.
Blogs Nowadays
But people who think more (smart people), took the idea and converted these blog in their own way using the same technology. Now there are 1000s of 1000s professional blogs available on the Internet related to News, Computers, Bio-Chemistry etc., you name it and you will get the blog about it. You just have to think the way you want to use your blog and share the information with the world. If the idea clicked, you can then earn good amount of cash from it. (But it depends on many factors which we will talk about in the future)Many blogs are focused on a particular subject or topic such as General News, Computer tips n tricks, Internet news etc., while others are a combination of multiple subjects. If it’s not your personal blog, than to increase the viewership or to have a discussion on multiple topics, you can ask others to write on your blog and that way your blog will then have multiple Authors, each writing on the different topics altogether like sports, technology, photography, etc. It’s really a good idea if a group of friends make one blog and then each person writes something in which he has good expertise.
It’s really not a big deal to write a blog about anything, because it doesn’t require any kind of technical expertise (at least for a basic blog). If you are passionate enough about sharing the information with the world, then there are websites (free) which give you enough services to fulfill your desire. Blogging can be fun, especially if you like reading, writing and talking about your favorite subject with the rest of the world. Believe me, It is a great stress reliever (but you need to take lots of stress in order to run a good professional blog as well). Most of all, there is no limitation in having a number of blogs. You can have multiple blogs with multiple topic discussions.
Layout Of Typical Blog
Most of the blogs will look something like as shown below:

And you will find following things at least on their pages:1. The topics will be arranged date vise. The newest will be on top.
2. On your left or right hand side, there will be an Archive Area where you can search for old articles.
3. Below every post or article, there will be an area where other people can comment on your post
4. A feed section like RSS or Atom for easy follow-up. (Read here : What is RSS)
2. On your left or right hand side, there will be an Archive Area where you can search for old articles.
3. Below every post or article, there will be an area where other people can comment on your post
4. A feed section like RSS or Atom for easy follow-up. (Read here : What is RSS)
5. A social bookmarking icons (Facebook, Twitter, etc.) for easy follow-up.Last Words
In this article I tried to highlight the purpose of a Blog, what blogs really are and what they really mean. At least after reading it, just think for a while that is it for you? Are you interested in doing it? Do you want to learn more about it? If the answer to all of these questions is yes, then in the next article we discuss who should really do blogging?
Do you have your own blog? Did you ever try to make one? What are your thoughts about blogging? Don’t forget to leave your Comments / Feedback below
4 cách gỡ bỏ quảng cáo trên Android
|
Source: TGTH
|


How to reduce SkyDrive synching problems
|
Source: Internet By Katherine Murray on April 24, 2013 in Best Practices Although SkyDrive is a big part of Windows 8 and Office 2013, Microsoft’s online data-storage service falls somewhat short of its potential. Fortunately, you can work around some of SkyDrive’s shortcomings. Here are some tips for living with SkyDrive. SkyDrive promises run up against realityI’ve recently completed three books on Windows 8 and Office 2013. Right from the start, I liked the save-to-the-cloud concept that is so much a part of the new OS and suite. During a typical work day, I move among a variety of computers and devices. I thought SkyDrive would provide a storage space for my documents that was simple to use and easily accessed from all my computers and devices. And I thought I could be sure I was always working with the latest version of a file and could also easily share those files with others as needed. That was the promise of SkyDrive. Reality was something else. For example, synching files between devices: It seemed I was spending far more time than I should, waiting for SkyDrive to sync the files produced on those various computers and devices. Different computers have different upload speeds. Surprisingly, my phone seems to be the fastest uploader of them all (though a phone is not ideal for managing files). Frustrated by my SkyDrive experience, I was curious whether other SkyDrive users were troubled by similar problems. This article shares what I learned. A (very!) short history of the SkyDrive serviceSkyDrive has been with us for longer than you might think. Released in 2007, it was known — for about a week — as Windows Live Folders. It was then abruptly renamed Windows Live SkyDrive. In those days, when the cloud was still a novelty, remote-file storage was limited — both from a technology standpoint and in available space. In the ensuing years, as cloud storage has evolved, so has SkyDrive. Available storage space has increased and is now built on HTML 5. Also, its ability to connect to various apps and devices and its file-sharing capabilities have improved. In 2012, Microsoft added a SkyDrive desktop application that let users more easily sync their files between devices. Now, for example, you can use SkyDrive to remotely fetch a file from any SkyDrive-enabled, Internet-connected computer. That’s handy if, while riding the train to work, you suddenly remember that the only current copy of that all-important presentation is still sitting on your home PC. Using SkyDrive, you can still grab the presentation — as long as you remembered to leave your home computer turned on and active. Today’s SkyDrive gives new users 7GB of free storage space, and you can purchase up to 25 GB. (If you were using SkyDrive prior to April 2012, Microsoft allowed you to upgrade to 25 GB of storage for free.) The most recent SkyDrive update arrived late last summer; Microsoft gave its cloud-storage service a makeover more in line with the new look of Outlook.com. Microsoft also invited Mac, iOS, and Android enthusiasts into the SkyDrive fold, giving it cross-platform compatibility rarely seen in Microsoft products. (SkyDrive is automatically included as an app on the Win8 Start screen.) Sign in to any SkyDrive-enabled device using your Microsoft account, and your settings for that account — as well as SkyDrive preferences — travel with you from device to device. Office 2013 users also find SkyDrive prominently featured in the Open and Save As screens, where you can save a document to SkyDrive as naturally as you would to a folder on your hard drive. Confronting — and solving — SkyDrive realitiesMicrosoft’s SkyDrive marketing messages, of course, paint an idyllic picture of anywhere, any-device file access and seamless integration with Office Web Apps. But as I’ve said, the SkyDrive synching is haphazard and sometimes unthinkably slow. For example, after saving a file to SkyDrive on my office system and then waiting for it to show up on the PC in the family room, I’ve sometimes resorted to emailing the file to myself so I could work on it immediately. If you’ve had similar problems, try some of the following fixes to help your SkyDrive files sync a little faster.
When everything else fails, try thisIf you have to resort to this next trick, SkyDrive really isn’t living up to its promise. This workaround is a bit clumsy — and it might seem chancy. But it might help if you’re pressed for time and SkyDrive does not seem to be finished synching your file. As with most file-synching apps, SkyDrive puts a green checkmark on files and folders when they’re fully in the cloud and ready for access on other devices and for sharing. But sometimes, the checkmark doesn’t appear for an extraordinary amount of time. That can be a problem if, say, your editor is tapping her foot, waiting for that Word-based article you need to submit immediately. I’ve tried emailing files stored in the cloud and lacking the checkmark; more often than not, the document was incomplete. But for some reason, if I copy and paste the file onto my local computer, the entire file is there! I assume this has something to do with the way SkyDrive saves and verifies files in the cloud. If you’d like to try this trick, simply right-click the file in SkyDrive, click Copy, and then paste the file into the local folder of your choosing on your computer. Be sure to open the file before editing it or emailing it somewhere, just to make sure all contents are truly there. SkyDrive will be a better product if Microsoft improves file synching. The easy integration with Win8 and Office 2013 makes it simple to save to the cloud, and the ease with which we can grab and share files among devices is something many of us need as we move from desktop to tablet to phone. But in order for all this magic to work, the files have to be available soon, not four hours from now. Katherine Murray is the author of Microsoft Office 2010 Plain & Simple (Microsoft Press, 2010), Microsoft Word 2010 Plain & Simple (Microsoft Press, 2010), and Microsoft Word 2010 Inside Out (Microsoft Press, 2010). She also coauthored, with Woody Leonhard, Green Home Computing for Dummies (Wiley 2009), and she writes and tweets(@kmurray230) about green-tech issues.
|


Why I Still Use Windows 7 After Trying Windows 8
Source: Howtogeek.com/
Have you upgraded to Windows 8 yet? We’ve published a lot of Windows 8 articles here at How-To Geek, and I’ve written many of them, but I haven’t. I still use Windows 7 on my PC.
This is just one geek’s opinion. I’ve been playing with Windows 8 for much longer than most people. It has been about a year since I wrote my first Windows 8 articles (using a prerelease) here at How-To Geek.
Mark has already written about how he learned to love Windows 8, so I thought I’d chime in with my own experience. I tried hard to love Windows 8, but I just can’t make it work.
Newer Isn’t Always Better
First, let’s get one thing out of the way. Bill Gates said “higher is better” when asked whether he used Windows 8, but this isn’t always the case in Windows-land. I remember Windows Me, which loved to blue-screen — I stuck with Windows 98. I remember Windows Vista, which couldn’t transfer files over a network at reasonable speeds — like many people, I stuck with Windows XP. Now a new Windows version shows up again and it’s time to evaluate whether this one is worth the upgrade (like 7 was) or whether we should stick with the old version of Windows once again.
I give credit where credit is due. Whatever you think of it, Windows 8 isn’t another Me or Vista. Both Me and Vista had stability and performance problems. Windows 8 is extremely stable and speedy. Windows 8’s problem is its vision, not its implementation.

It’s the Best Desktop Ever, But…
I’ve catalogued Windows 8’s many desktop features and security improvements. And yet, I still don’t want to upgrade to Windows 8 on my non-touch laptop. I’ve already listed the reasons why Windows 8 would be a worthy upgrade, but now I’ll list some reasons why I just don’t want to pull that trigger.
- You Will Boot to Metro, and You Will Like It – Microsoft was adamant that Windows tablet users would never have to use the desktop (although they’ve failed at this), but they clearly don’t think desktop users should have the ability to boot straight to the desktop. Sorry, Microsoft – I want to work at the desktop, I don’t want to consume content in the Modern interface. Many Start menu replacements allow you to boot straight to the desktop, but this only happens after a delay at login. Microsoft went out of their way to prevent instant booting to the desktop after people started doing this in a preview release.
- The Start Screen Imposes a Cognitive Burden – The Start screen forces a “context shift” in your attention, obscuring the rest of your work and everything else going on. Usability experts have said the dual (and dueling) interfaces impose a “cognitive burden.” Solutions like pinning every app you use to the taskbar just make for a cluttered taskbar if you use a lot of applications occasionally. Sure, you caninstall a third-party Start menu like the excellent Start8, but shouldn’t we send a message to Microsoft that we want Windows 8 improved, rather than upgrading, being unhappy, and plugging the holes ourselves?

- No Unified Search – Searching for a program or file in Windows 7 is easy. Press the Windows key, type part of its name or contents, and you’ll see all the programs and files that match your search. You can press Enter to open the searched-for item immediately. Microsoft has added an additional step in Windows 8. Searching will only search your installed applications by default, after which you have to click Settings or Files if you want something else. Some settings appear under Apps, some appear under Settings, and some appear under both. As a tech writer, this means I have to write out an additional step each time I tell readers to search for and launch something. Like lots of other things in the Modern interface, the search experience takes up the full screen and shows less content.

- The Windows Store is a Huge Missed Opportunity – When I first heard that Windows 8 would ship with a central app store, I was thrilled. After years of using Linux distributions, I knew just how convenient a centralized software installation and updating tool was. But Microsoft chose to only allow installation of Modern apps from the Windows Store, not desktop apps. Sure, a few desktop apps are listed in the store, but those are just links to download them – the store won’t handle installation, updates, or syncing apps between devices. The Windows Store could have been the biggest reason to upgrade, but it’s useless on a desktop (and isn’t too great on a tablet, either).

- Modern Creeps Into the Desktop – So you’ve installed a Start menu and enabled “boot to desktop.”Aside from seeing the Start screen and putting up with a delay each time you log in, you’ll see a lock screen for tablets each time you lock your computer. Disabling that requires a trip into group policy orthe registry editor. You’re not done yet: The app switcher and charms appear when your cursor nears the corner of the screen, popping up and distracting you from whatever you’re doing. Good thing you can also disable the charms and app switcher hot corners. Even after this, you’re not out of the woods. Click the Wi-Fi icon and you now have a huge Modern-style sidebar for selecting your wireless network – the system tray is obscured, so you can’t quickly click another icon. Click the Sound or Battery icon and you’ll see the standard small system tray pop-up dialogs – it’s not even consistent. Other things are also Modern-style no matter what you do, like the action-selection dialog when you insert media or plug in a device. Oh, and don’t forget to change the default file associations, or you’ll be kicked back to the full-screen Modern interface when you open image, music, video, and PDF files.

Is the Modern Interface the Future of PC Computing?
Some people like Windows 8 so much that they insist Microsoft will be removing the desktop in the next few versions of Windows, moving us all to the new Modern interface. Many people may indeed be better off with the Modern interface if they just use their computers for general browsing, social networking, and media consumption, but this is pretty crazy to anyone who works on a computer.
The reasons why I haven’t switched to doing all my computing in the Modern interface should be pretty clear to anyone who’s used Windows 8, but I’ll cover them anyway:
- No Side-by-Side Applications – I spend a lot of my time working with a web page open on one half of my screen and a writing application open on the other. This isn’t possible in the Modern interface. You can have side-by-side apps, but one must take up a tiny sliver of your screen. Aero Snap was a defining feature of Windows 7 for desktop productivity, but the Snap feature in Windows 8 is clearly designed for chatting while doing something else, not for actually being able to view complicated content in two apps at once.
- Poor Support for High-Resolution Monitors – I have a 17” 1920×1080 monitor in my current laptop. Windows 8’s Modern apps make very poor use of this screen real estate. I can’t even have multiple apps on screen at a time. Windows 8 feels like it’s designed only for 1366×768 13” touchscreen laptops.

- I Don’t Want to Live in the Microsoft Ecosystem – Windows 8’s Modern interface takes us to a place where being a Windows user means using Bing, SkyDrive, and Xbox Live, playing mobile games from the Windows Store, buying music from Xbox Music, and renting videos from Xbox Video. If you use an online calendar, it better be Microsoft’s, because Windows 8 can’t sync with Google Calendar anymore. The Video app is more focused on selling me videos than letting me play the videos I already own. Do most Windows users really want this? I want to use Google, Steam, Rdio, Netflix, and whatever other services I prefer. I want to choose services based on their own merits, not be shoehorned into any one company’s ecosystem or forced to choose services with Modern apps. Many popular services, like iTunes, don’t have any Modern Windows 8 apps.

- It’s a Closed Platform – The Modern interface only allows you to install apps Microsoft approves. Sideloading is restricted to developers and corporate networks. Microsoft shouldn’t have a veto over what we can and can’t run on our computers. We’ve seen what happens with Apple’s iOS – games banned because of their content, a year-long delay on Google Voice so Apple could hamper a competitor, no competing web browser engines, and more. Imagine if Internet Explorer 6 was the only web browser that could be used on Windows XP and where we would be today – probably still using Internet Explorer 6. (And, under laws like the DMCA, bypassing this restriction to install unapproved software is a crime.)

- The Windows Store and Its Apps Are Bad – Even if the Modern interface was awesome, it wouldn’t matter. The Windows Store is a very sad place. The number of apps has improved, but quality is more important than quantity – and the quality just isn’t there. My PC doesn’t need crippled tip calculator apps, it needs powerful software.

Windows 7 is Still Pretty Good
After trying to like Windows 8 on the desktop, I came back to Windows 7. It immediately felt like an operating system designed for how I use my computer. It knows I don’t have a touch-screen and doesn’t act like I do. It presents consistent dialogs on the desktop. It doesn’t try to push Microsoft services on me. It’s a much more comfortable desktop experience that doesn’t feel schizophrenic like the “Jekyll and Hyde” Windows 8 interface does. I’m not forced to hunt around disabling things and learning to live with the things I can’t disable.
What exactly do I lose by sticking with Windows 7? The desktop may be a bit snappier, but I don’t notice that with a Core i7 CPU. Boot-up is faster, but I sleep or hibernate my computer when not using it anyway. Gaming performance is the one thing where increased performance could sway me, but benchmarks have demonstrated that gaming performance is about the same. File-copying is dramatically improved, but I don’t do much file-copying and TeraCopy works well for that. The new Task Manager is really nice, but I still preferProcess Explorer.
If you offered me a desktop-only edition of Windows 8, I’d be thrilled. But, for my desktop use, Windows 8 gets in the way more than it helps improve my desktop experience. Windows 7 is great, and there’s a reason businesses are sticking with it. Windows 7 is the new XP.

Maybe You Should Install Windows 8 Anyway
As tech geeks, many of us have an obligation to know about Windows 8 and how to use it. If you might get stuck supporting Windows 8, you should probably install it and learn about how it works. But, after writing scores of articles about Windows 8 for various publications and using it on-and-off for a year, I feel I already know Windows 8 very well. And I know I don’t like it — not really. Maybe I would enjoy it with a touch-screen or a convertible device that could be both my laptop and tablet. Convertible devices have a lot of potential, although the Modern environment doesn’t offer the apps that an iPad does or the openness and freedom to go outside the app store for censored apps that Android does.

The Takeaway
Microsoft, listen to your users. Desktop PCs aren’t going away. There will always be people who need to use computers for work, and adding the Modern interface to the Server version of Windows shows us Microsoft just doesn’t get it. Let go, Microsoft. Convince us the Modern interface is better by actually making it better, not by forcing all Windows users to use it.
Word is that Windows Blue is fixing some of these issues, particularly by allowing Modern apps to snap in 50/50 view, allow for additional Modern apps on screen at once on higher-resolution monitors, and re-introducing a unified search experience. These are some good next steps, but the Modern interface will never match the flexibility of the desktop for power users because it’s built on limitations. The complaints of desktop users have not yet been addressed, even after consistent negative feedback throughout Windows 8’s public testing process.
Perhaps I’ve just become stuck in my ways and resistant to any change at the ripe old age of 26, but I don’t think so. Change can be good, but change isn’t inherently good. I think a lot of other people feel similarly about Windows 8, and that’s why we haven’t seen the adoption, line-ups and positive press that accompanied previous versions of Windows, such as Windows 7.
